- October 27, 2021
- Posted by: admin
- Category: BitCoin, Blockchain, Cryptocurrency, Investments
This guide and review for the SeedSigner Bitcoin hardware wallet helps users protect their private keys in an entropy-preserving way.
SeedSigner is the new, cool kid on the block when it comes to DIY Bitcoin hardware wallets. It’s a very interesting device that certainly does things differently compared to the other hardware wallets on the market.
Highlights include:
- It’s cheap to make (costing $50)
- It allows for QR communication between the device and the computer
- It is non-persistent
- It’s a bring-your-own-entropy (BYOE) device
- It is made of general purpose hardware

The project was “born” on December 14, 2020, but it started getting most-deserved attention recently.
Let’s start from zero and work our way to using the device so we can see what’s all the fuss about:
Preparation
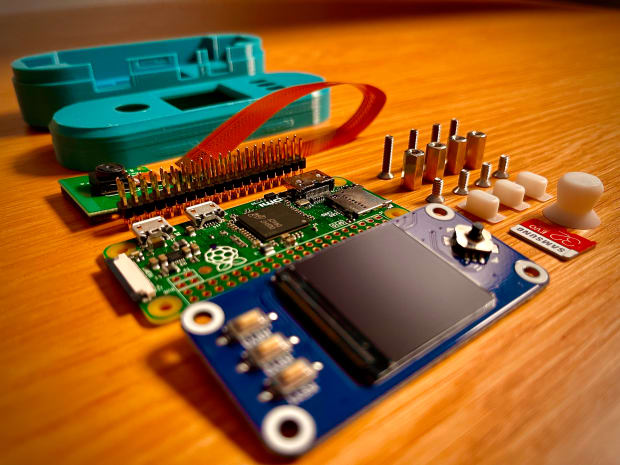
The part list:
- Raspberry Pi Zero (no WiFi)
- SD card
- Waveshare 1.3-inch LCD
- AuviPal 5MP camera with OV5647 sensor
- MakerHawk ribbon cable
- GPIO Hammer Header (male)
- Four F-F M2.5 spacers (10 mm)
- Four M2.5 pan-head screws (6 mm)
- Four M2.5 pan-head screws (12 mm)
- 3D-printed case (I got mine from https://twitter.com/surfacePlasmon, feel free to hit him up for any of your 3D-printing needs)
- One joystick
- Three plastic buttons
Everything in the picture set me back around $100. It’s worth mentioning that I did not try to get the cheapest options, but the fastest ones, and some of the components were overpriced. I also went for the expensive case that was $35, the cheaper one goes for $10. You should be able to get the costs of materials down to $50.
After you get all of the components, we will need to download the operating system and burn it to the SD card.
Image Burning
SeedSigner uses a modified version of Debian for Raspberry Pi. Debian is a Linux distribution that only uses free and open-source software (FOSS). You can get the latest release here.
After we get the archived .IMG file, we need to verify it. The file is signed by the maintainer of the project, and we will use their credential to verify the integrity of the file. For this, we will be using GPG, which is a program that allows us to import the authors public keys and verify signatures. This is present on all Linux operating systems and Mac (which is also based in Linux). If not, you can get it here.
Now, we need SeedSigner’s GPG public key.
The maintainer has the key listed in multiple places. “Why?,” you ask?
Well, we are trying to make sure an attacker did not replace the file we want to burn on the SD card with a malicious one, but if an attacker would be successful in compromising the place from which we get the files, of course, they would also change the public key with their one, so we can’t tell the file is fake.
That’s why you should always check the key in multiple places.
You can find the key:
- On Twitter: https://twitter.com/SeedSigner
- On Telegram: https://t.me/c/1469623205/6308
- On GitHub:https://github.com/SeedSigner/seedsigner/blob/main/seedsigner_pubkey.gpg
So, we will open a terminal and type in:
curl -sS https://raw.githubusercontent.com/SeedSigner/seedsigner/main/seedsigner_pubkey.gpg | gpg –import
Now that we have the key imported into our keychain, let’s get the files from:
https://github.com/SeedSigner/seedsigner/releases
We will get two files:
- Seedsigner_0_4_4.img.zip — the archived image
- Seedsigner_0_4_4.img.zip.txt.gpg — the signature produced by the author
The next command we will run will confirm the integrity of the file:
gpg –verify seedsigner_0_4_4.img.zip.txt.gpg

We are looking for “good signature.” This is a confirmation that everything is ok.
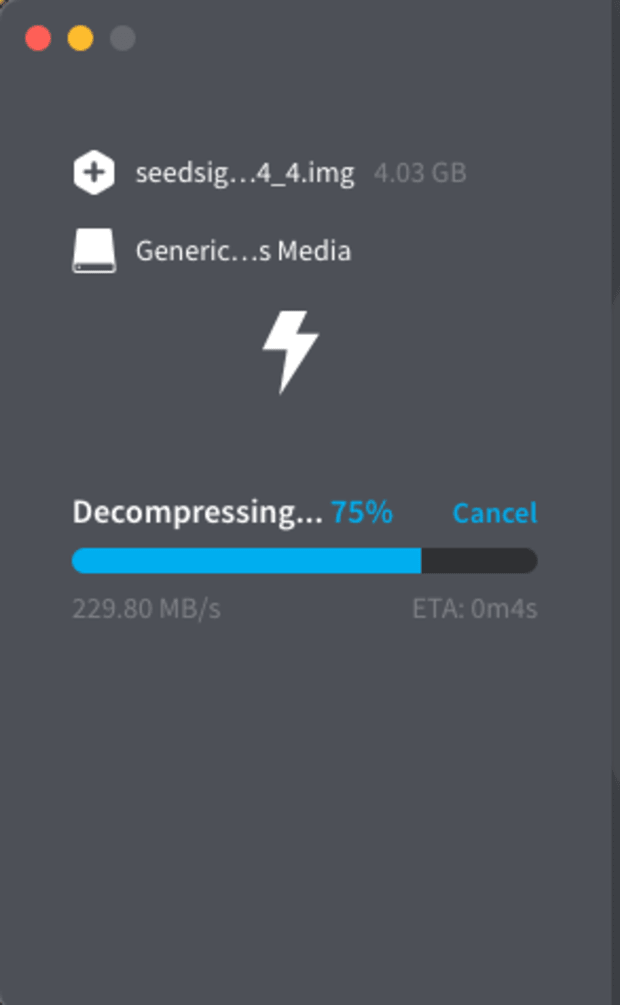
Now that we know the .IMG is real, we can write it to the SD card. For this, I use balenaEtcher, a software that allows you to burn the .IMG file to the SD card. It is pretty straight forward and you can use drag and drop.
Also, download this template here and print it out, it will be useful later.
Now comes the fun part.
Assembling The SeedSigner Bitcoin Hardware Wallet
Insert the solder-less Hammer Header in the GPIO pins. Apply pressure until they are in.
Even though this adds a bit to the cost of the device, it could still be worth it if you don’t already have a soldering iron and solder, and if you don’t plan to solder anything else in the future.
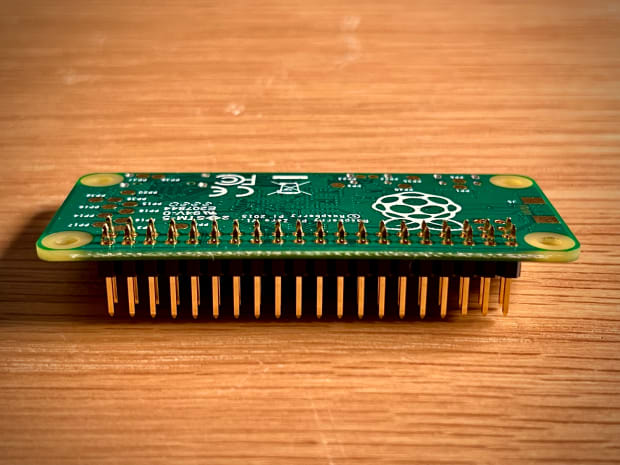
Also, fuck you soldering iron.
Insert the wide side of the ribbon cable (the one shaped like a trapezoid) into the AuviPal 5MP camera. Make sure the shiny contacts face the green circuit board.

Now, take the narrower part of the ribbon cable and attach it to the Raspberry Pi Zero. The same thing as before: shiny contacts need to face the green circuit board.
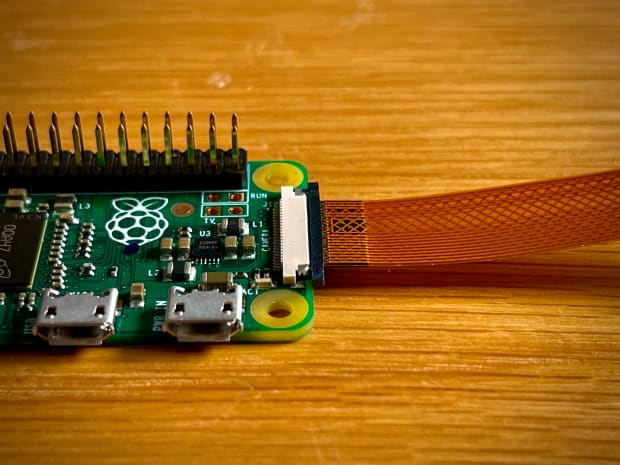
Now, take the bottom part of the case and fit the camera in the camera holder. Use a bit of pressure until you hear a click.

This is how it should look from behind:
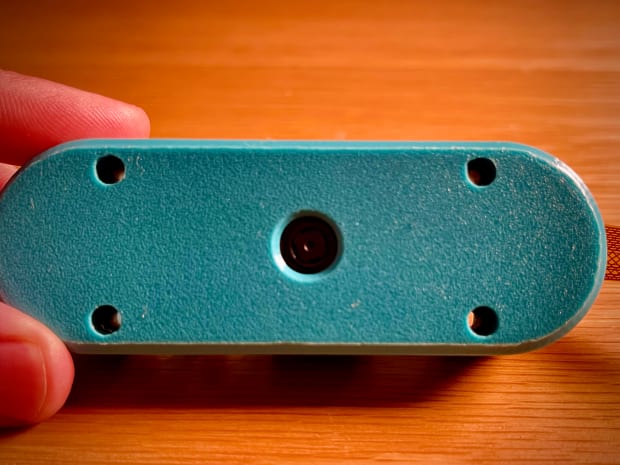
Insert the SD card in the Pi. Then, gently place the Pi over the camera. Orient the Pi so that the ports fit in the port grooves.

Place the 10 mm F-F M2.5 spacer over the holes in the front.

Insert and tighten the 12 mm M2.5 pan-head screws from behind.Repeat for all four holes.
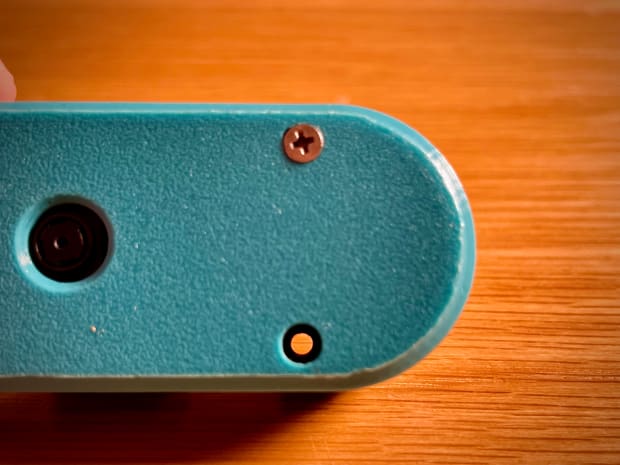
Repeat for all four holes.
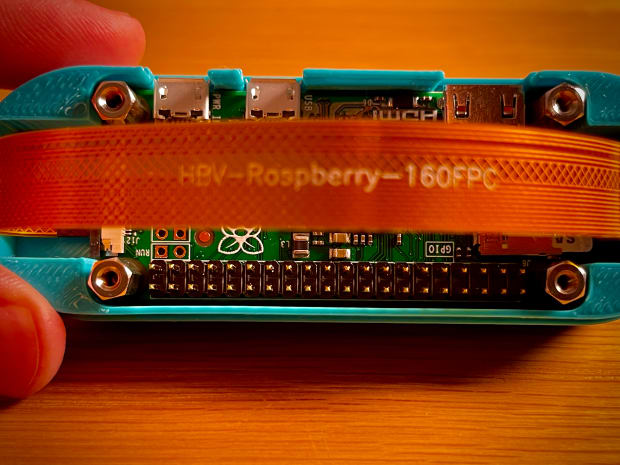
Insert the Waveshare 1.3-inch IPS LCD display into the GPIO pins.
The process should be very easy and straightforward as there is the same number of holes in the display as there are pins.
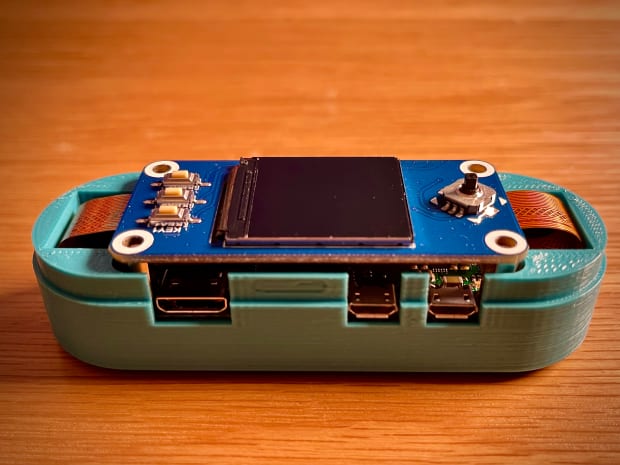
Using the four remaining 6 mm M2.5 pan-head screws, secure the display by screwing in the 10 mm F-F M2.5 spacers.
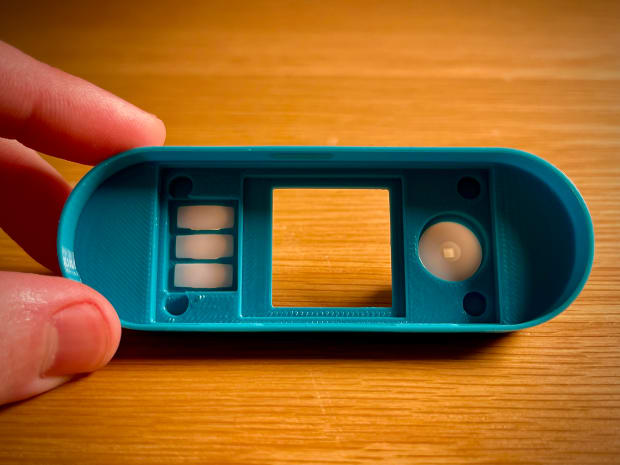
Snap the bottom and upper parts together.

And now the assembly is done.
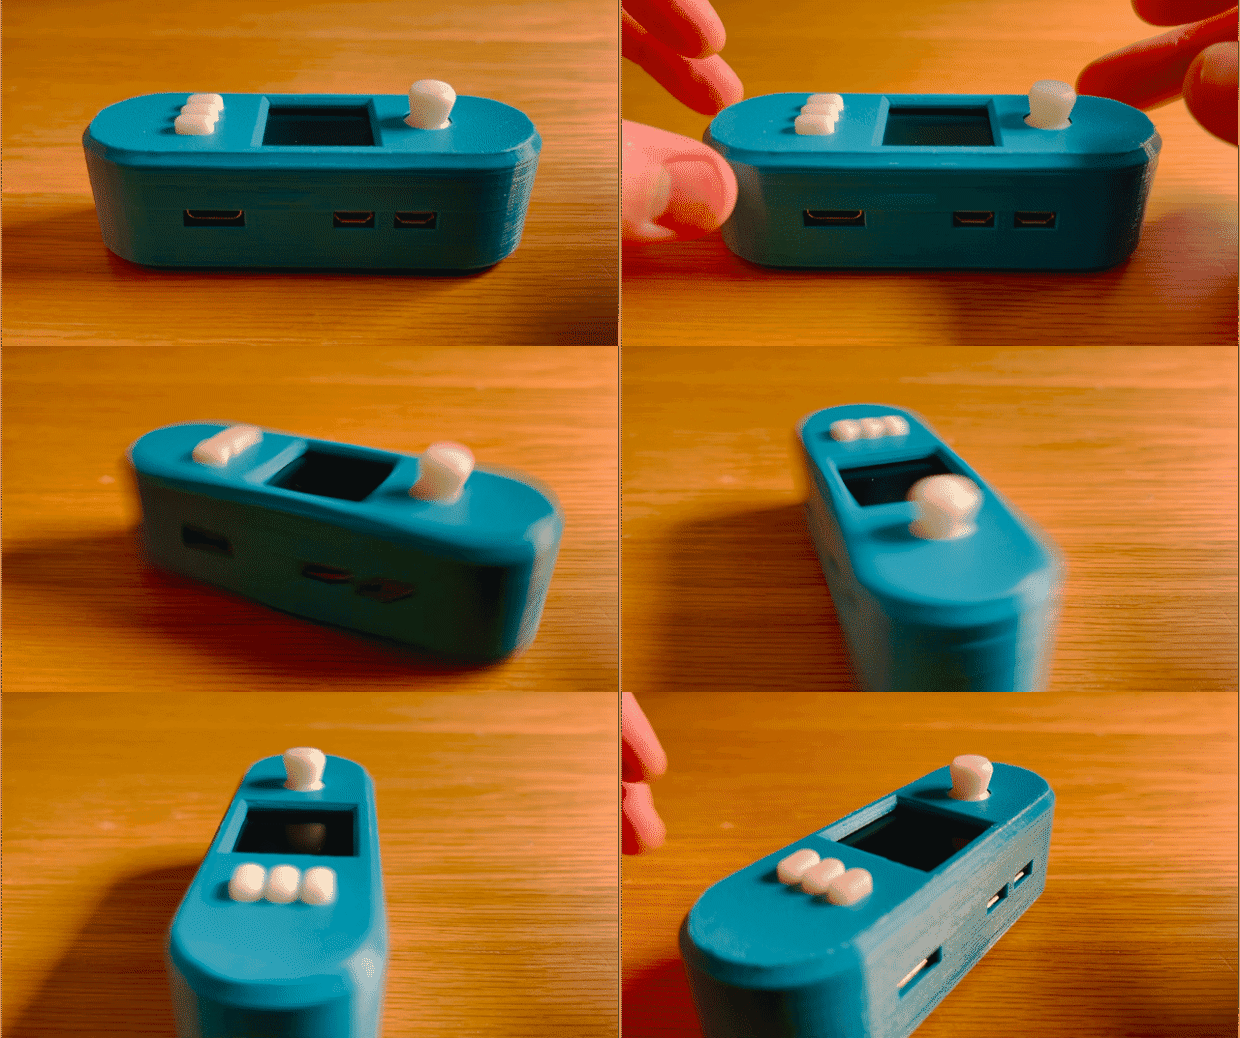
Using The SeedSigner Bitcoin Hardware Wallet
Powering On
Before anything else, we need to plug the SeedSigner into a power source. The whole idea behind SeedSigner is that it’s an air-gapped device, meaning that it’s isolated from any internet connection, this is where most of the security comes from.
The Raspberry Pi Zero has two ports, and the most left one only allows power, so it’s perfectly safe to plug this into the USB of your computer if it’s easier.
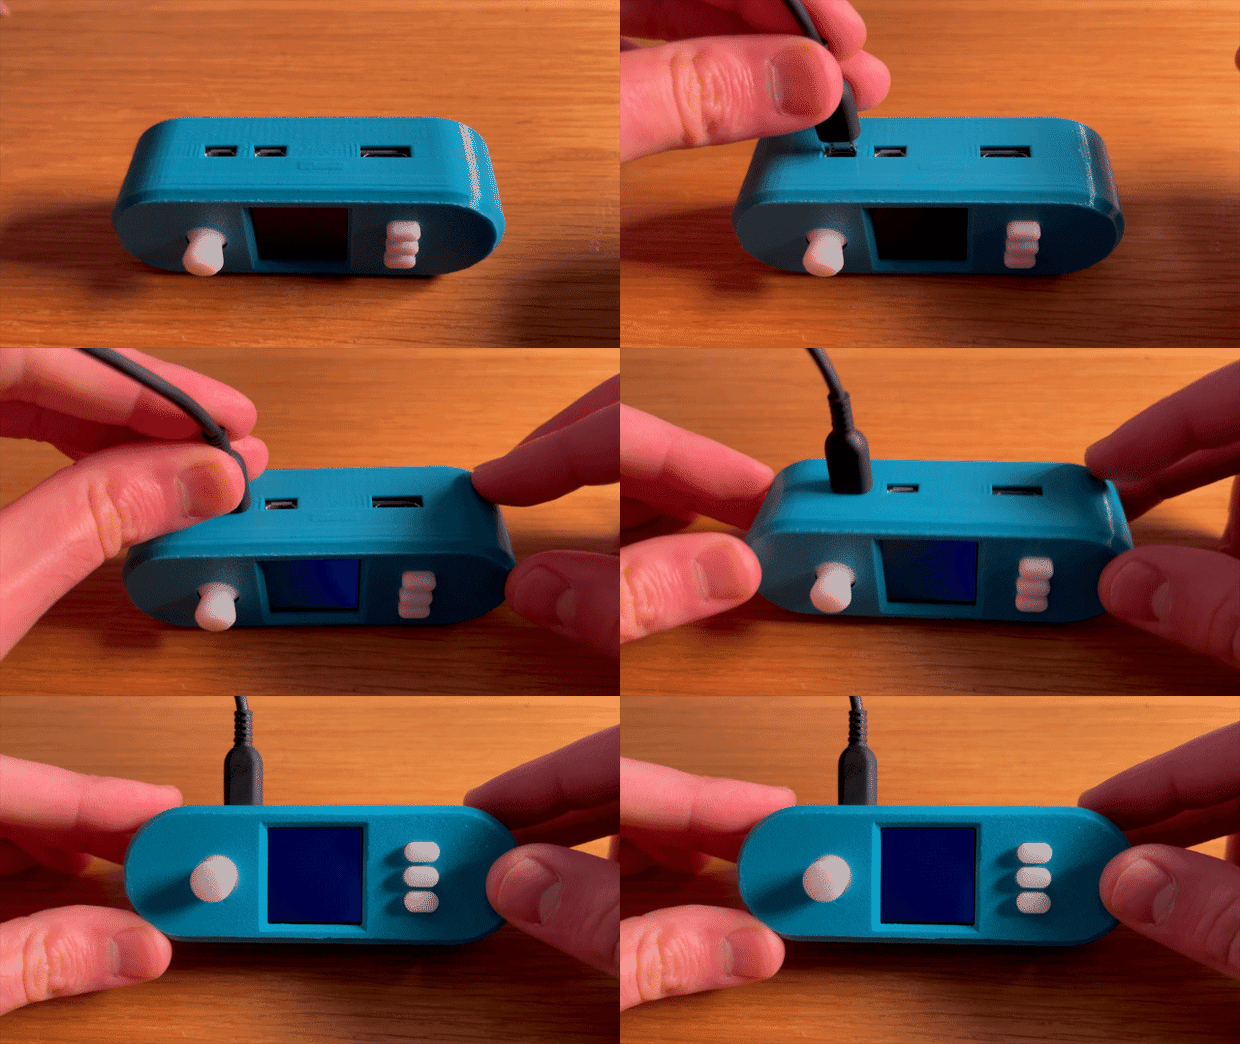
Don’t worry if you don’t see anything on the screen, the device takes about 45 seconds to boot up.
Seed Generation
We have two options available to generate a BIP39 seed:
- Dice
- Picture
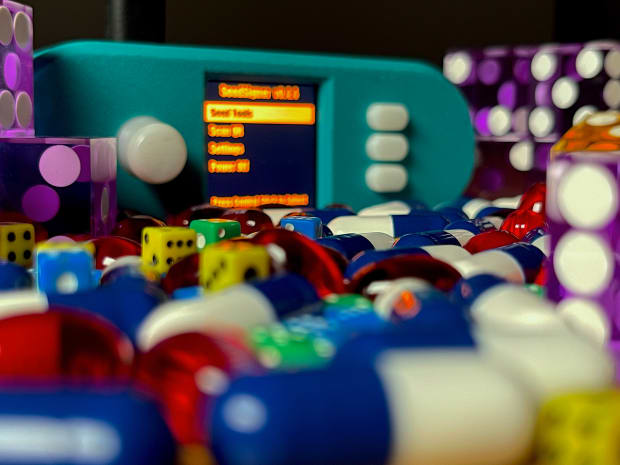
Both of these methods are great sources of entropy as they don’t depend on specialized hardware. Most of the devices we use have special hardwares that are used as sources of entropy, but most of them can’t really be audited, and this creates a big attack vector. And even if someone does not try to mess with them, there could be bugs.
This BYOE approach is great as it completely eliminates these worries.
Good entropy (from a cryptographical POV) means that no one else can reproduce what you did, and the picture and a successive set of 99 rolls of dice are really good for this.
We will be using the picture mode here, as it’s quite easy to do and takes less time:
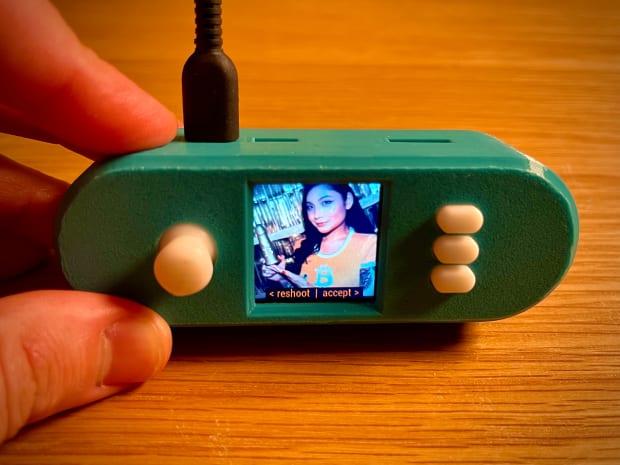
In the menu, go to “Seed Tools,” then “Generate Seed With Image.” Point the camera at something and press the joystick. If you’re happy with the picture click “Accept.”
Generating Seed Backup
Now, take the template and write down the BIP39 words. Using a pencil is preferred, as it withstands the test of time better (scroll right with the joystick to advance).
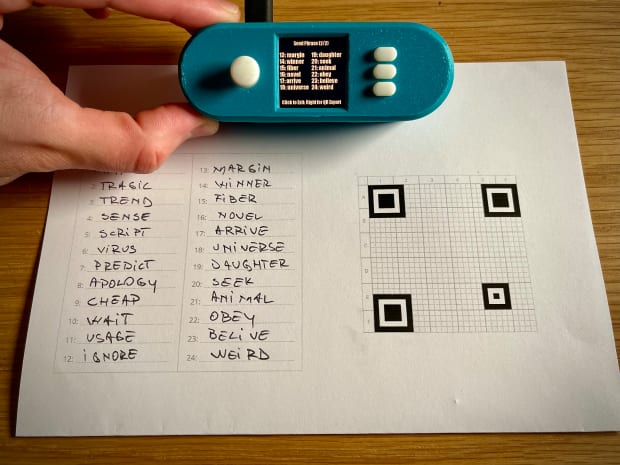
After scrolling past the seed words you will see a QR code on the screen. The QR encodes the words in a more compact way that is easy to read for computers. Even though it’s not tangible for humans, it’s a great way to transfer information between devices and it has error correction.
You transfer the exact amount of information you want, which allows us to keep the device air gapped and avoid any malware being transmitted during communication.
By pressing on the joystick, you will be taken into zoom mode. Here you can use the joystick to navigate and the X and Y coordinates help you identify where you are on the QR code. Notice that this is the same as the QR present on the template.
You will start from position A1 (that’s the upper-most left corner) and work your way around the QR. Again, I suggest using a pencil, as graphite is resistant to ultraviolet radiation, moisture and other chemicals, making it great for long-term storage solutions.
Here is a speed-up video of me transcribing the BIP39 seed that’s encoded in a QR code to the template we downloaded earlier:
When done, click “Save Seed.”
As the saved seed is completely non-persistent, meaning it does not store any information on the device, you will need to import your seed every time you want to make a transaction. You can store the seed temporarily, but it will be wiped once the device reboots.
Get The Wallet xPub
Next, we need to import the xPub on our computer. This will give us access to all of the addresses to receive funds in the future and check the stash without connecting the device. We can generate any addresses we want in the future so we can receive funds, while the seed remains safe on the paper.
We will set up the wallet for single-signature use.
In the menu, go to “Settings,” then “Script Policy,” then select “Single Sig Native SegWit.” Then return to the main menu. Then go to “Seed Tools,” then “xPub From Seed.” Use the saved seed. Check if the words match with the backup and pick “Sparrow Wallet.”
You will be presented with a QR code on the SeedSigner — this is the xPub that we will import on the computer.
Importing The xPub
We will be using Sparrow Wallet.
By the way, my favorite Bitcoin app has been Electrum since the first day I got into Bitcoin. It’s the Swiss Army knife light Bitcoin wallet that allows me to use my own server.
But Sparrow is a better version of that, which also looks and feels very cool. You can get it here.
In Sparrow Wallet, on your computer, create a new air-gapped hardware wallet. Click the “Scan” button next to the SeedSigner icon and present the QR from the SeedSsigner to your camera. When the QR is recognized, the details will be filled in.
Set a password, and we can receive some coins.
Don’t worry if something does not make sense, you can get back to it later.
Receiving Bitcoin
Next, we are going to receive some bitcoin.
We can get a new address by clicking “Get Next Address” or selecting one from the “Addresses” tab. The imported xPub allows the computer to calculate all of the addresses that belong to the specific BIP39 seed.
In the video, I am sending 0.0001 BTC from the “Trendon Shavers” (imagine this is another person) wallet to the SeedSigner wallet. This is a hot wallet set up on the computer.
Notice that in order to get a new address, we did not need access to the SeedSigner.
Spending Bitcoin
Now we will be using the device for what it was created for, QR signing.
By the way, the person behind the SeedSigner Twitter handle and the main maintainer of the project prefers the terminology “optical air gap signing” (pretentious bastard).

Now we will be sending the coins back to the same address we received them from.
In Sparrow Wallet, we paste in the destination address and the amount, and the fee as we would do in any “normal” Bitcoin wallet, and then we create the transaction. The way Bitcoin works is that the construction of the transaction and the signing are separate steps. Usually wallets abstract this away as they prioritize user experience.
If we try to broadcast the transaction without signing it, the nodes will not find a valid signature and will not allow the coins to be spent, so we need to produce a signature. We want to get the unsigned transaction on to the SeedSigner so it can sign it, and we will of course use QR codes again.
There is something different about these QR codes; they are animated. Why? Well because they need to send more information.
Imagine that you have someone using sign language to communicate with someone else. If they want to say a long sentence, they need multiple signs, one after the other. In order to produce a signature, we need to use the private keys, which we have backed up on the paper in the form of a QR that represents the BIP39 words.
First, we will import the seed in the SeedSigner using the QR code we have on paper. While doing so, we double-check to make sure the words match.
After this, we will be asked to scan the PSBT QR (PSBT stands for “partially-signed Bitcoin transaction,” which is what the animated QR represents). Now, we point the SeedSigner at the computer screen. As soon as this is done, we are asked to confirm the details of the transaction.
After the confirmation, the SeedSigner signed the transaction (serving its existential purpose) so now we have to pass the signed transaction back to the computer to broadcast it.
Of course, we will use an animated QR code again, but this time, we will be scanning with the camera of the computer from the SeedSigner. After that is done, we click “Broadcast” and we see the transaction showing up on the block explorer.
Don’t worry if this is a bit confusing, I promise you after you do it yourself once, it’s less intimidating.
The SeedSigner Bitcoin Wallet: In Review
General-Purpose Hardware
The biggest selling point in my opinion is that the SeedSigner uses general-purpose hardware.
Hardware wallets are a great invention, and for almost anyone, they increase the security of their bitcoin stash by 100-times compared to using your phone or computer. This is done by eliminating components that are not strictly needed for Bitcoin signing operations (software and hardware) and by segregating the device (some more than others) from the internet and other devices.
But in order to deliver such a device and enforce these restrictions, this means you have to create a device that’s designed for this specific purpose, meaning that this makes it an easy target for an attacker.
It’s pretty obvious that a Bitcoin device will be used for Bitcoin stuff, but these third-party attacks can range in different ways.
Your device can be intercepted and an attacker can plant things on it that could transmit information on the device or screw with the seed generation or even mess with the transaction creation process so that you send the coins to their address instead of your own. There have been multiple attempts to solve this problem, but I don’t think any of them offer a real solution.
For example, a lot of hardware wallets seal the bags in which they save the device. These are trivial to open and reseal. If anything, they offer a false sense of security. (I do want to mention that the only real solution in this direction is offered by https://www.entropyseal.com/, but the product is currently just a prototype).
The hardware used for these devices can also be targeted in the factoring process or before that, to implement any variants of the above-mentioned attacks. The truth is that even auditing the device is not as easy as you may think, even though wallets like the ColdCard try to mitigate these problems (through a transparent case and the use of a green light to give the ok on the firmware)
Now, these may seem a bit like tinfoil-hat things, but they are real concerns, and as bitcoin rises in price, the chance and incentive for them to happen scales proportionally.
Aaaanyway, all of these worries are eliminated when you buy hardware that can be used for anything.
The chance of someone knowing that you will use a Raspberry Pi Zero, which is used for 10,000 other things, as a Bitcoin hardware wallet is almost zeo. I think people in the space have got to a point where they think that hardware wallets are silver bullets and they don’t realize that all of that security you get comes with tradeoffs
Bring Your Own Entropy (BYOE)
Your private key is entropy. Entropy means randomness, disorder, and the reason why these are important properties for the private keys is that if someone wants to guess the keys, the only solution is to go through all of the possibilities of private keys that there are. And trust me, there are a lot — 2^256 or about as many atoms there are in the visible universe.
This is what we call needle-in-haystack technology.
The topic of entropy is very vast and deserves an article of its own (maybe a video of its own, follow me at https://twitter.com/raw_avocado), but usually, we have some specific hardware dedicated to this purpose. Most of this hardware is not auditable, and even though on paper some of them are open, you can’t really check under the hood and see what you got there.
The SeedSigner again eliminates this worry completely by only allowing you to use your own entropy. The dice rolls option is also supported by the ColdCard and is a great way of adding this security, but it is a bit time consuming. The picture option also is great, as it’s almost impossible to get the same picture two times.
Even though it might look like two pictures are the same to you, they are not. Even the smallest variations in light and angle will result in a separate picture. On top of that, all of the cameras also detect small radiations that are truly random and thus add to the total entropy of the picture.
Using An Operating System
Most of the hardware wallets use microcontrollers, which means that they are very small computers that have most of their components under one single chip. As you can imagine, these computers are very dumb and weak, but this lowers the attack surface. Also, most of the hardware wallets run the programs that do the Bitcoin operations straight on the bare metal.
As I mentioned, the device takes 45 seconds to boot up and this is because it needs to boot up a full operating system the same as your laptop. The SeedSigner uses the RaspberyPi version of Debian, which, even though it is a stripped-down version of Debian, still has a lot of things inside of it, which means attack surfaces.
It’s worth mentioning that the whole philosophy behind Debian is to use only free and open-source software. The device is of course completely air gapped, so these attacks are kind of nullified. But it still adds to big boot time.
There are conversations regarding easy improvements of the boot time, and someone is even working on a custom Kernel, so keep an eye out for this.
The Bitcoin stuff added on top of the OS is very minimal and is written in Python, and uses well-reviewed libraries, and includes very minimal code, which makes it pretty easy to look through and see how the sausages are made (this coming from someone who is not a developer).
Navigation
Navigation on the device is a bit clunky and I would love to see the use of the right buttons, as that feels the natural way to use the device. Also, I would like to jump back and forward between menus using the joystick.
This could be a very easy fix and it will be present in future updates. Developer Keith Mukai is already working on a new user interface for the menu, which is currently tested.
QR Seeds
Even though this is a security product, user experience is still crucial. If the solution is too inconvenient, it will not be used by anyone, or even put people off while they try it.
The transcribing of the QR code took me literally one full hour. Truth be told, it would have gone faster if I used a Sharpie, but as I mentioned, that’s not the best for long-term storage. Some people use a Sharpie and then vacuum seal the paper, but that’s just another level of inconvenience and requires additional stuff, so no thanks.
Some people told me that they nailed the process with a Sharpie down to five minutes after practice. But if you need to practice to get this going, then this is a bad process from the start.
I honestly feel that this is a solution for a problem that should not exist in the first place. The Raspberry Pi Zero does not have any storage device, so there is no place to store the device except on the SD card, which is used to run the OS. I do know they are also working on improving this and allowing for SD card backups, so stay tuned.
Mukai is the one who came up with this idea to encode the BIP39 seeds as a QR code, and you have to admit this is a pretty clever and creative idea. And considering where the project currently is, it definitely makes things better than the alternative of importing it using the virtual keyboard.
But, compared to the other hardware wallets, it’s not 10-times better, which is how I judge things when I see a new product on the market. A plain-text electronic backup is better than a plain-text paper backup, as even if you have the seed in plain text on the SD card, you still need the additional step to insert the SD card into a computer in order to read it, nevermind the fact that you can encrypt it.
Residue Screen
This is not something to worry about, but it’s something I noticed, and I thought I’d mention it, as the device is advertised as stateless:
If you plug out the power supply while the QR is visible on the screen when powering it up again, during the 45-second boot you can see the residue of the QR. It’s worth noting that this is not the proper way to turn off the device, as it has a full OS running on it. That’s why there is a shutdown option from the menu.
But if I naturally did this, I can imagine other people will also. This of course only “leaks” your xPub, so it can be just a privacy concern if anything, and again someone needs to have your device for this to be the case, so not a major issue.
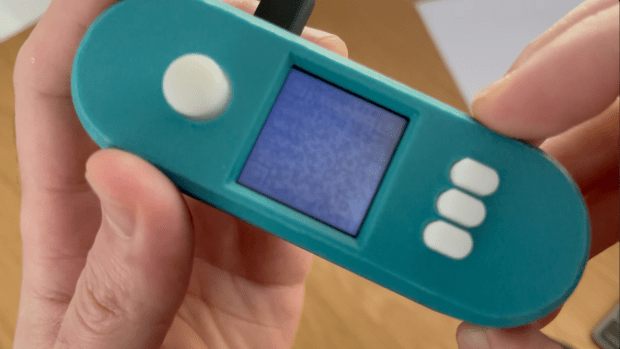
When I brought this up in the SeedSigner Telegram group, it turned out it was a known issue, and there is a fix for it: a screensaver. Mukai strikes again.
Conclusion
Even though I had some criticisms of the SeedSigner, I still think it’s a great device and offers a good and new set of trade-offs.
The device is recommended to be used as one or more signatures of a multisig setup and the whole point is to use different devices from different vendors with different tradeoffs and risks, and the SeedSigner brings this variety.
Looking at how the project evolved, I see a good trajectory and want you to keep in mind that this is a very young project. The fact that the project combines general-purpose hardware and BYOE makes this device very attractive to me and screams trust minimization, and no targeted third-party attacks.
All of the interactions I had with people working on the project were great. And by that, I don’t mean nice (which they also were), as that does not really matter. I mean that every concern and question I had was always answered in a straightforward and honest manner. That matters a lot for me.
The device is perfect for someone who is a relative beginner and wants to learn how Bitcoin works under the hood. The project is very easy to put together, and because all of the steps in a transaction are broken up, you get to do them separately and manually — you get to look under the hood.
Anyway, let me know what you thought about my review and if you have any trouble while making your own, you can shoot me a DM on Twitter, but I suggest also checking out the Telegram group.
This is a guest post by Alex Waltz. Opinions expressed are entirely their own and do not necessarily reflect those of BTC Inc or Bitcoin Magazine.
